DIY command center
If you’re someone who likes to have visual reminders – a command center if you will (as the Pinterest moms call it) – in your face everyday so you don’t forget things this project may be perfect for you. It’s a pretty place for things like your keys, sunglasses, notes-to-self, and everything you need to see before you leave the house.
SUPPLIES & MEASUREMENTS FOR NEAR REPLICA (click links for where to buy!)
30” x 16” x 1/2” piece of wood
3.5” x 13” x 3/4” wood for shelf
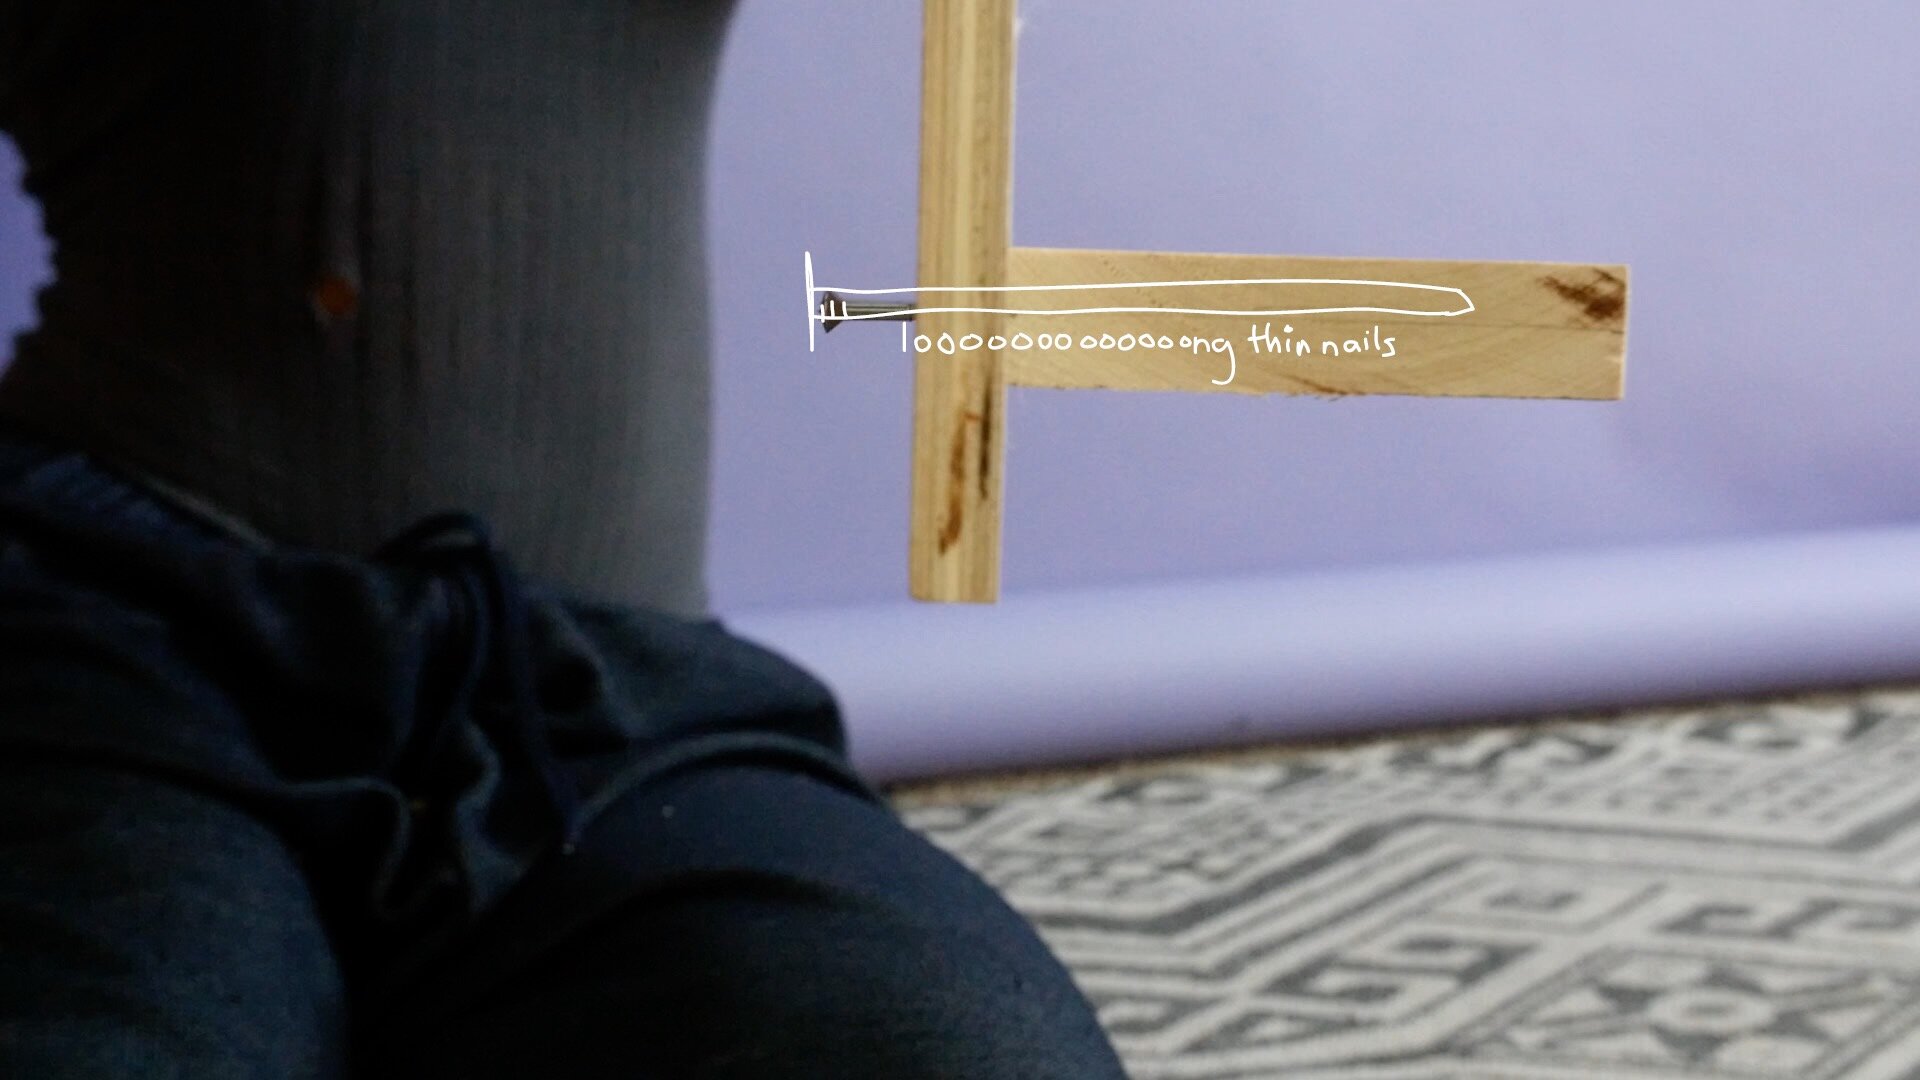
two short nails
two ordinary nails
any 11.75” x 11.75” dry erase surface, or Ikea LOTS mirror
optional 6” x 7.5” dry erase surface, or iridescent acrylic sheet
11” x 5.5” fabric covered cork board (see mini tutorial in video below at 2:48)
durable bracelet (see mini tutorial in video below at 2:48)
sunglasses
two sticky memo pads
TOOLS NEEDED
hammer
screwdriver
hot glue gun
scissors
X-acto knife (optional)
ruler (L-square best)
box cutter (if cutting acrylic sheeting, see demo here)

1. Have Home Depot cut down your wood board and shelf to the correct sizes above.
2. Lay your board down and place your items as you’ll want them displayed. Mark the placement for the dry erase surfaces, cork board, sunglasses rack, memo pads, and shelf.

3. Correct these marking with an L-square or T-square, to prevent placing items on a crooked angles.
4. Screw down two D-rings a couple of inches from the top corners in the back of your board. Wrap hanging wire between them with an inch or two of slack.
5. Hammer in four equally spaced long flathead nails into the board through the back and into the shelf, being careful to hammer the nails straight.
6. If you want to add color, sand, prime, and the paint board at this stage. Allow to fully dry.
7. Secure bracelet at its designated spot by hammering down the ends with two short nails.
8. Hammer two nails halfway into the board to for where the memo pads will hang via bulldog clips.

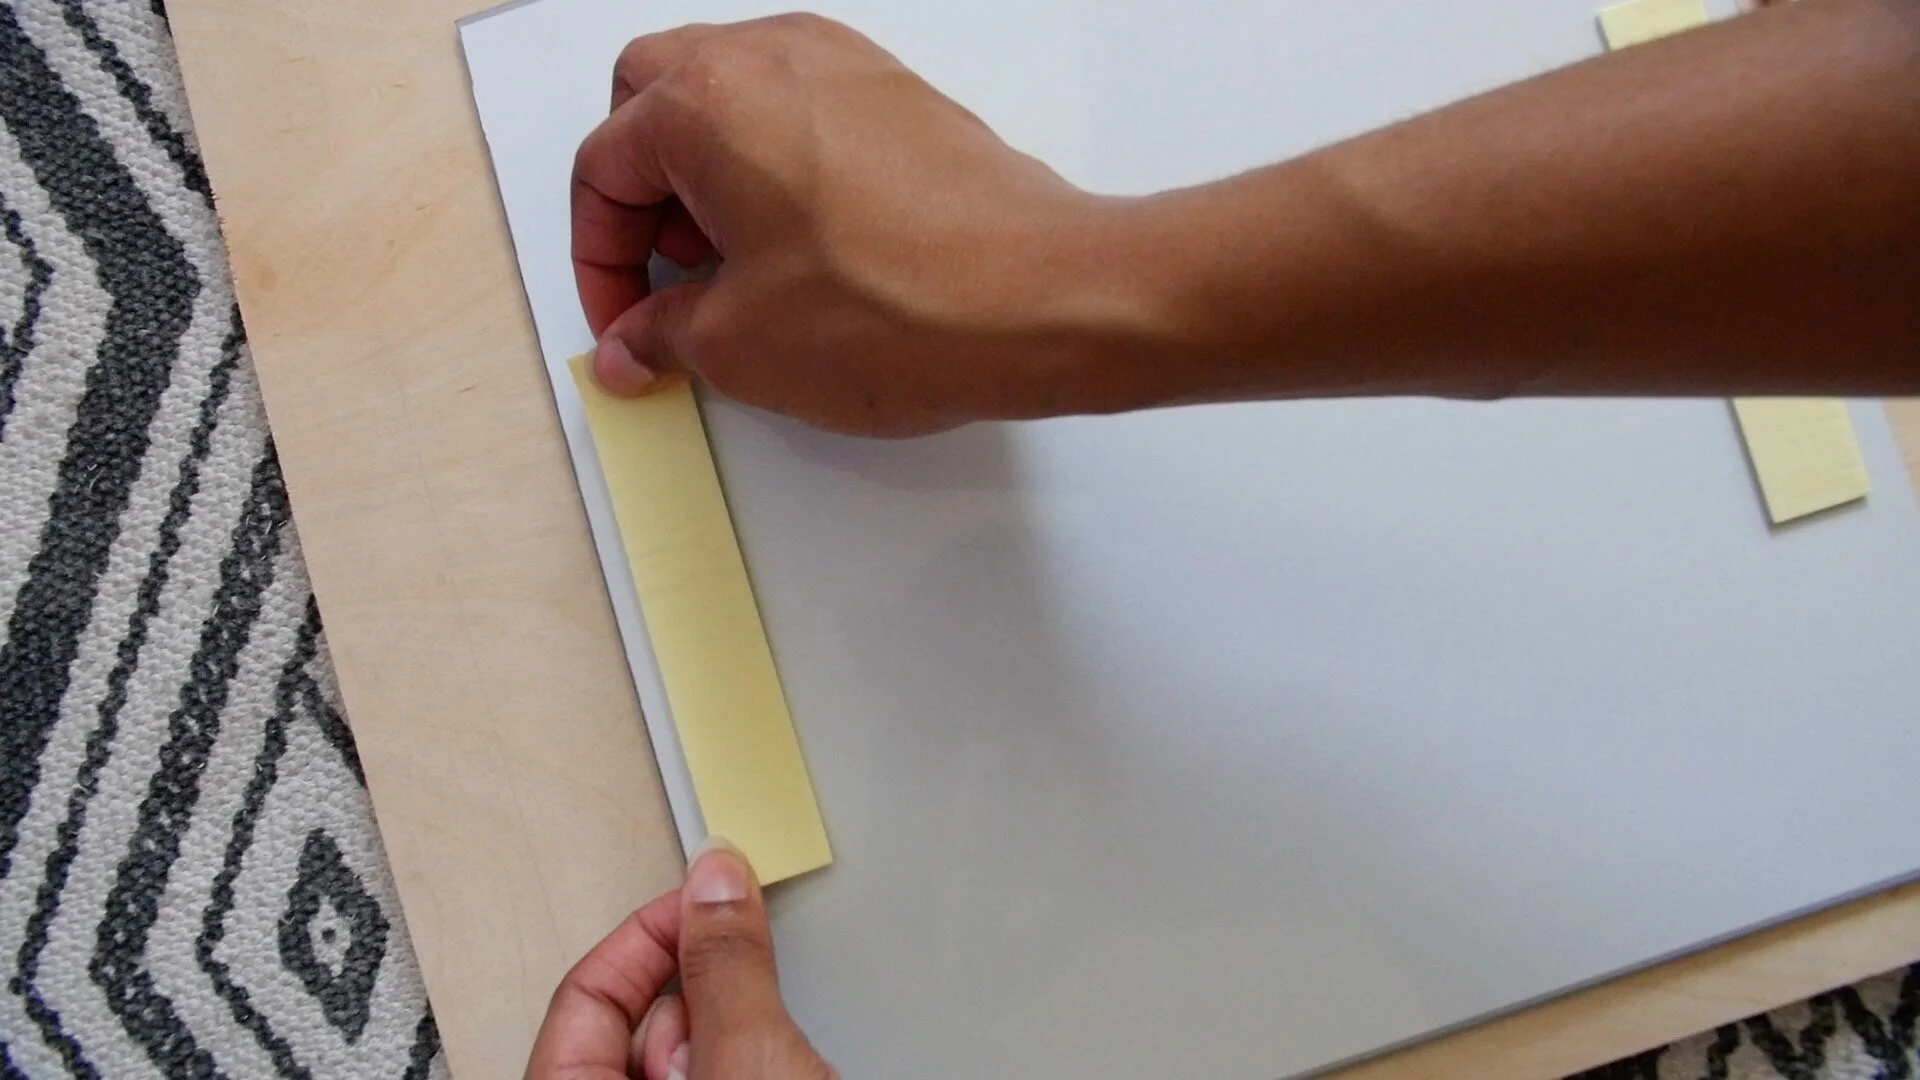

9. Place command strips on all four corners of the back of your cork board, and place in its designated spot. Repeat for the larger dry-erase surface. Be careful with placement! Command strips are really sticky, so you only really have one chance to place it right.
10. Making sure to mark with a dry erase marker where to place your second dry erase surface, place four thick dots of hot glue in the corners, and place your surface down. ***If using iridescent acrylic sheeting like me, place on slant (to reveal iridescence) by placing two glass table top bumpers down in the two right-most corners before placing hot glue gun dots. Hold in place until dry.

11. You’re done! Hang sunglasses, pin things to your cork board, and hang your memo pads